If you are upgrading your Garmin NAV V/VI to a Garmin Zumo XT or XT2 GPS this locking adapter will solve your problem and allow you to mount the Zumo XT/XT2 in the same place as your BMW Garmin NAV V/VI.
The Zumo XT and XT2 are slightly larger than the Garmin NAV V/VI. The installation of this upgrade makes it possible to mount the Zumo XT or XT2 in the BMW factory NAV Base. Our kit contains spacers to retrofit the Zumo XT or XT2 to the factory NAV Base. However, when spacing the new unit off the factory NAV base the lock no longer engages. Our kit includes the locking adapter plate restoring the factory lock and retaining the factory appearance, preventing the need for aftermarket mounts on your handlebars.
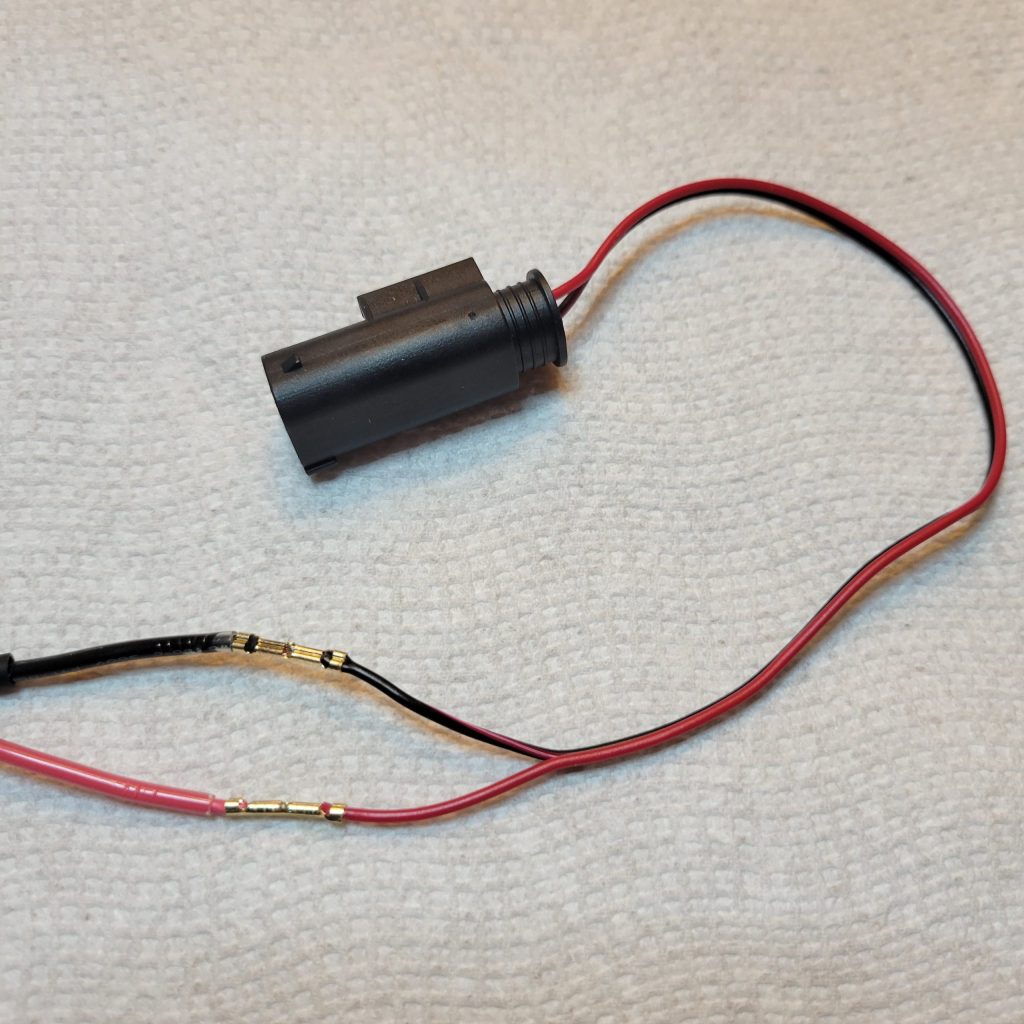
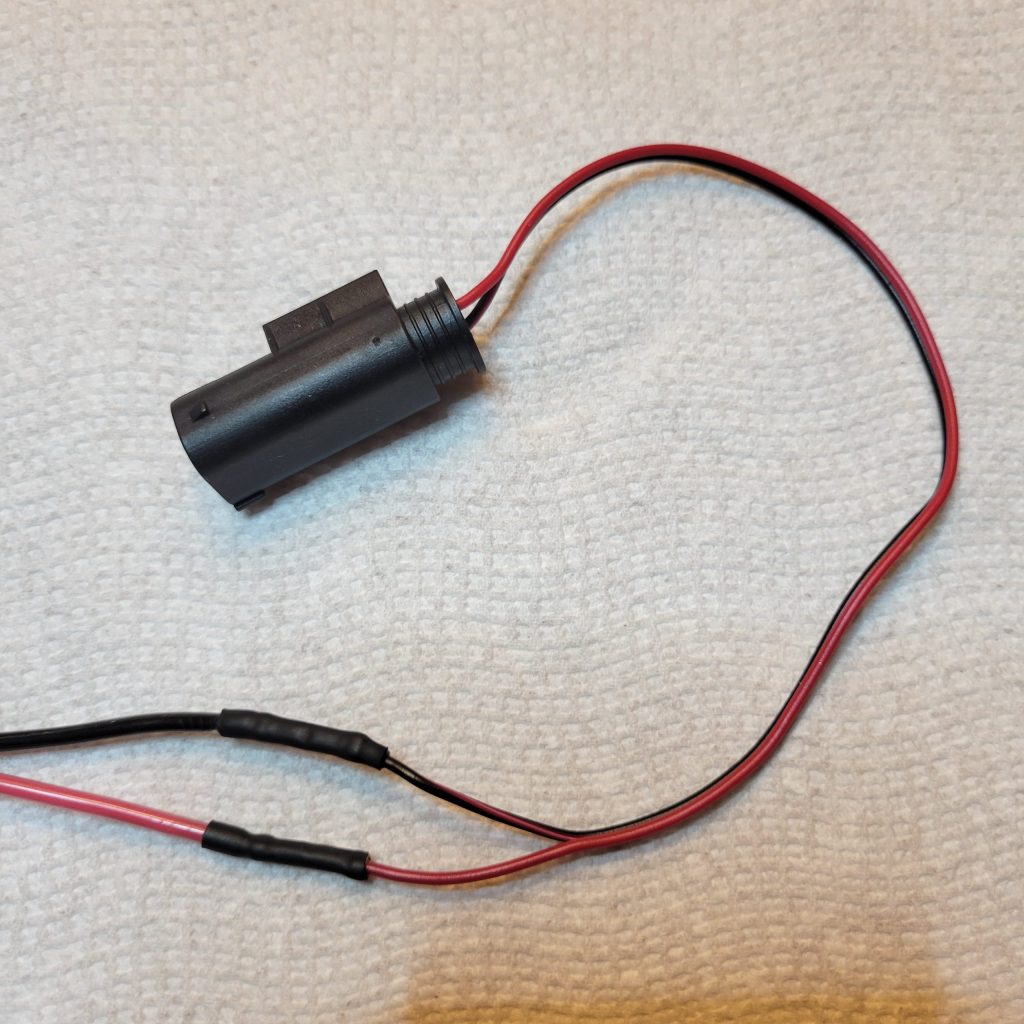
The Zumo XT and XT2 are supplied with unterminated power and ground wires. Our kit also includes the matching plug for the factory harness, in the right frame area. You will need to connect the supplied plug to the Zumo XT/XT2 harness utilizing the supplied crimp connectors. Once complete, with no modification of the factory harness required, the entire assembly can be connected to the vehicle ensuring voltage supply to the unit for charging and ignition control.
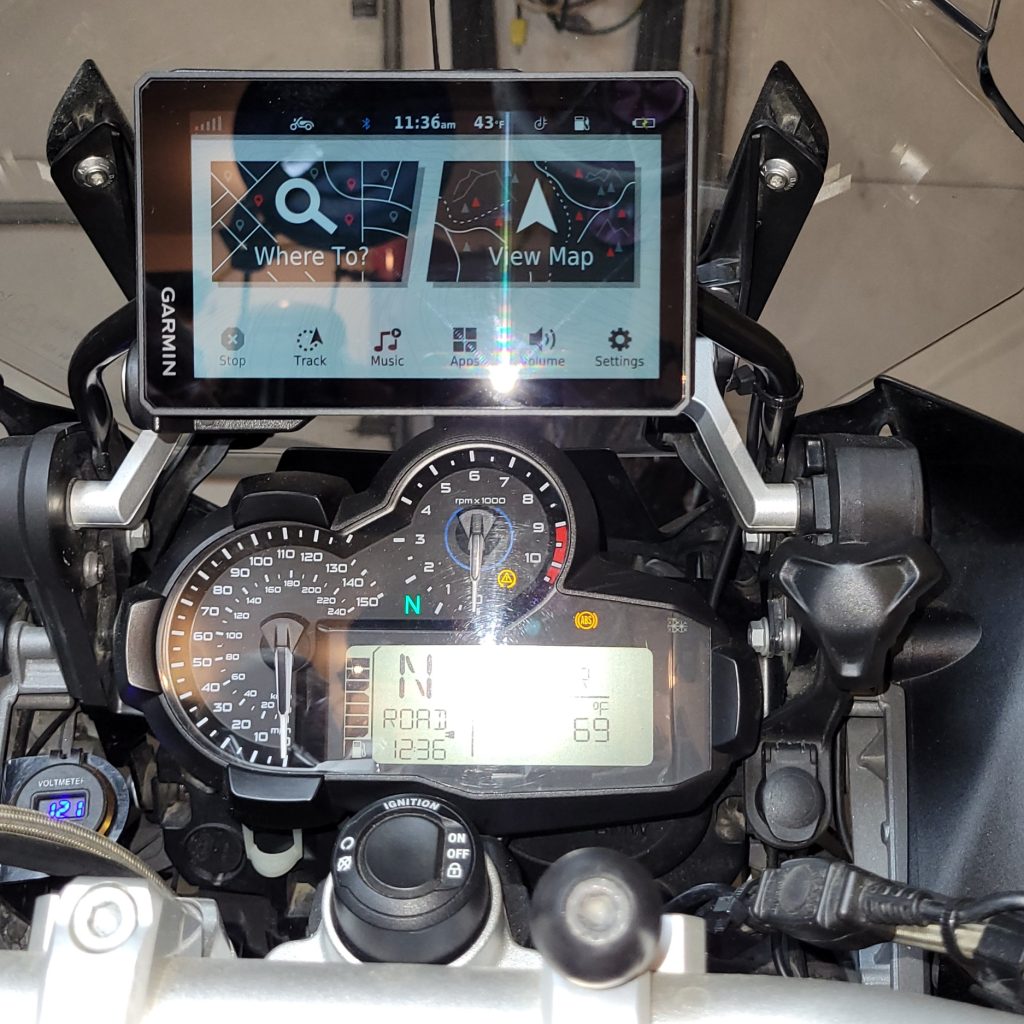
When complete, the Zumo XT and XT2 only sticks out an additional ½ inch towards the rider allowing full view of the instrument cluster. Included with the purchase are as follows:
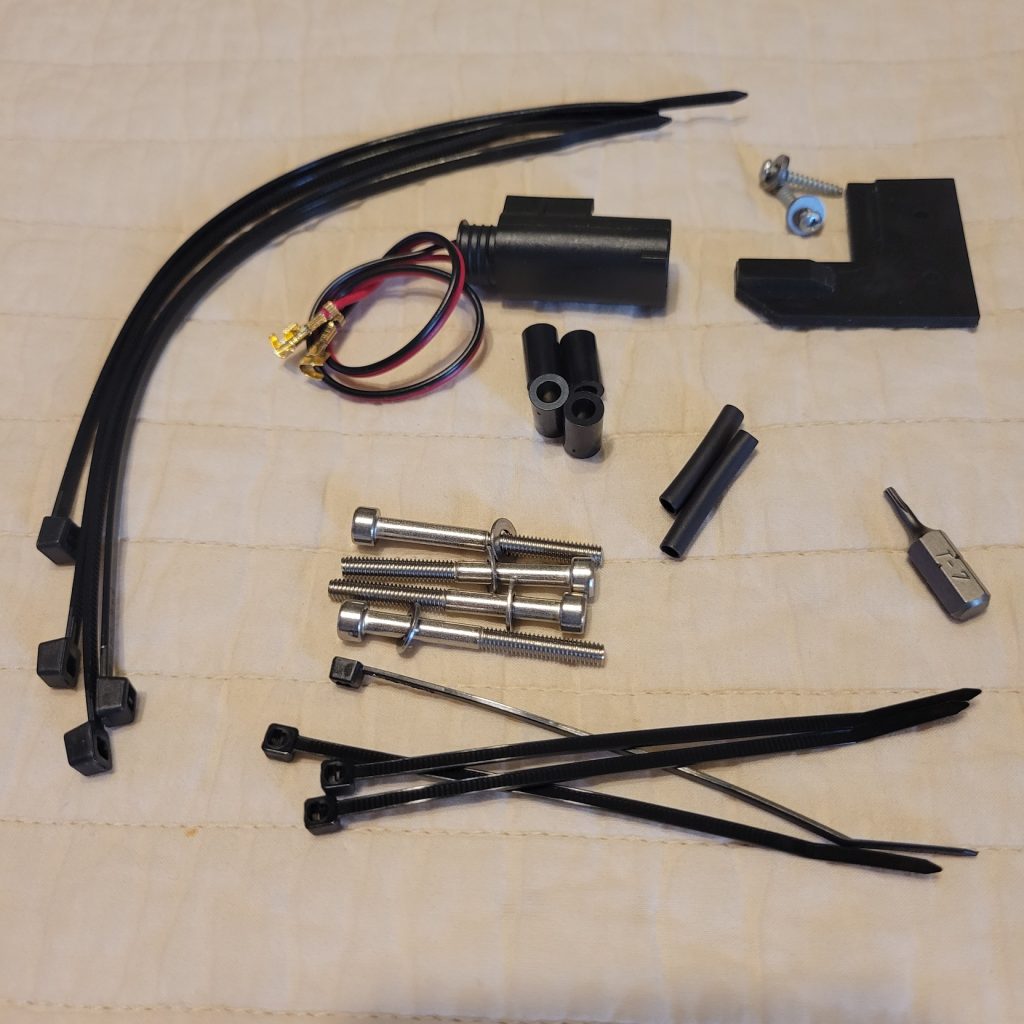
- 1 locking adapter plate
- 1 BMW adapter plug
- 4 Black spacers
- 4 M4 x 40mm stainless steel screws
- 4 9mm washers
- 2 mounting screws and washers for
- the adapter
- 8 cable ties
- 2 heat shrink tubing
- 1 T7 driver
Step 1 ***Optional but recommended***
Remove the windshield with a T25 socket. There are two T25 screws, one on each side of the windshield, that are quickly removed to allow better access to the routing of the wiring and electrical plug in the right frame area. This process is very quick and allows access behind the NAV unit and adequate space to run the wiring for the Zumo XT. Once you remove the screws, gently push down on the top of the windshield while holding the bottom of the windshield with your other hand. Note: It may be handy to have an extra pair of hands to help hold the windshield while removing the screws.

Step 2
Take four small strips of masking/painter’s tape, scotch tape, etc. and place over the four recessed nuts on the backside of the base that holds the BMW mount to the bow or bar that the BMW NAV base is attached to. This will hold the 4 nuts in place throughout the process.
Step 3
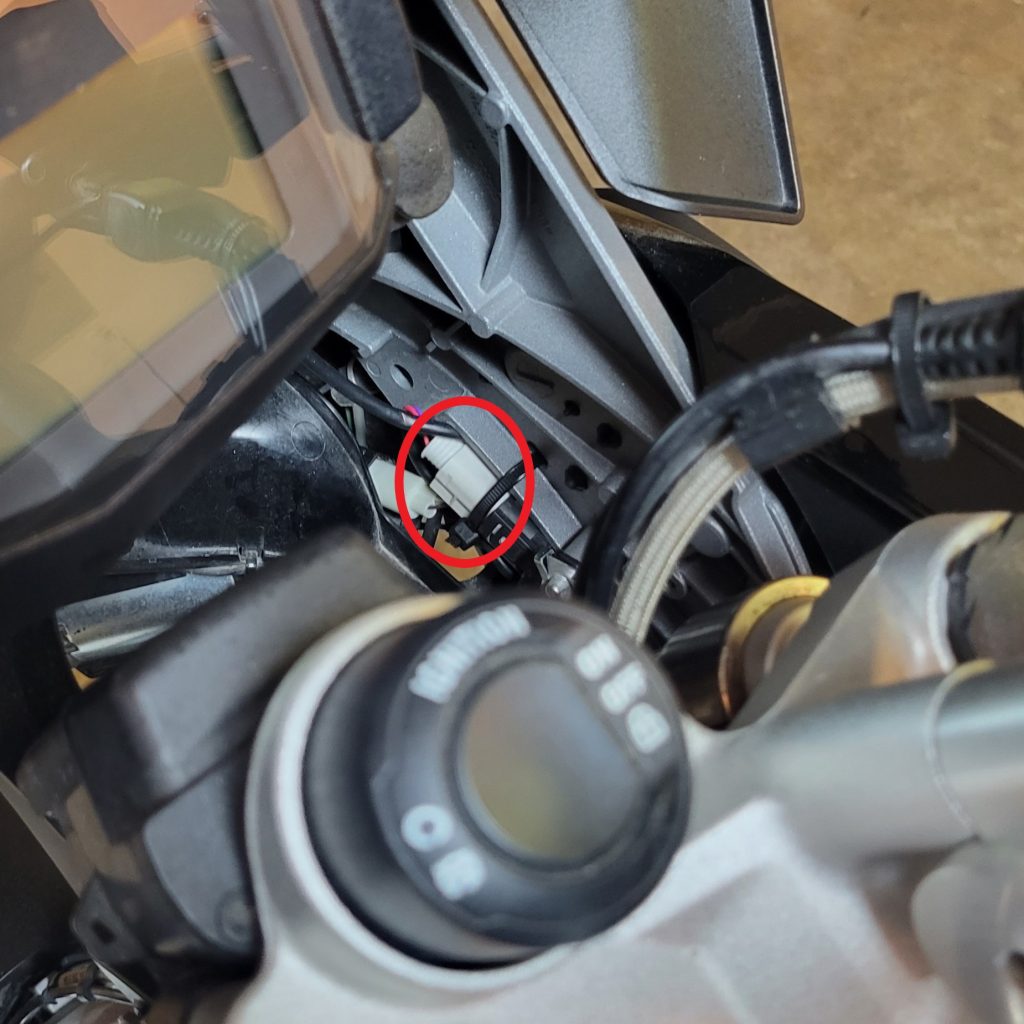
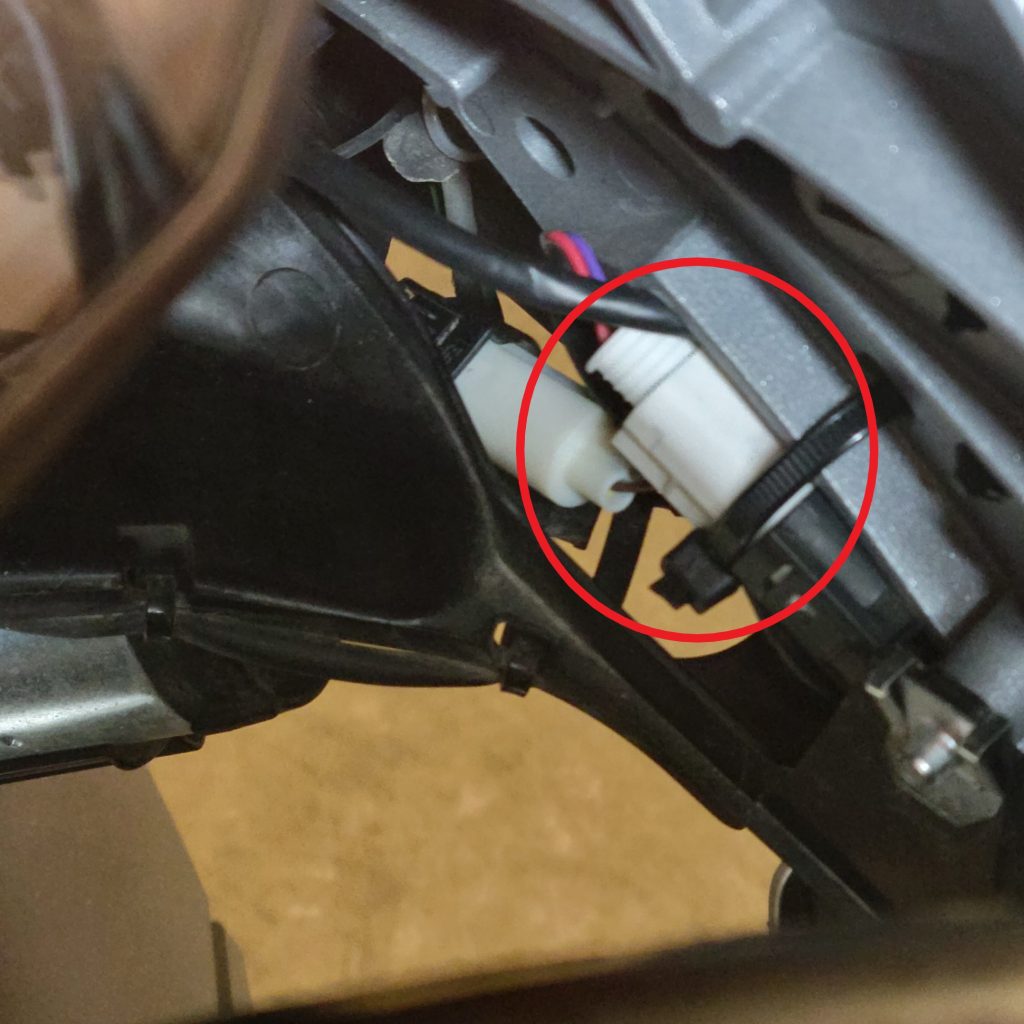
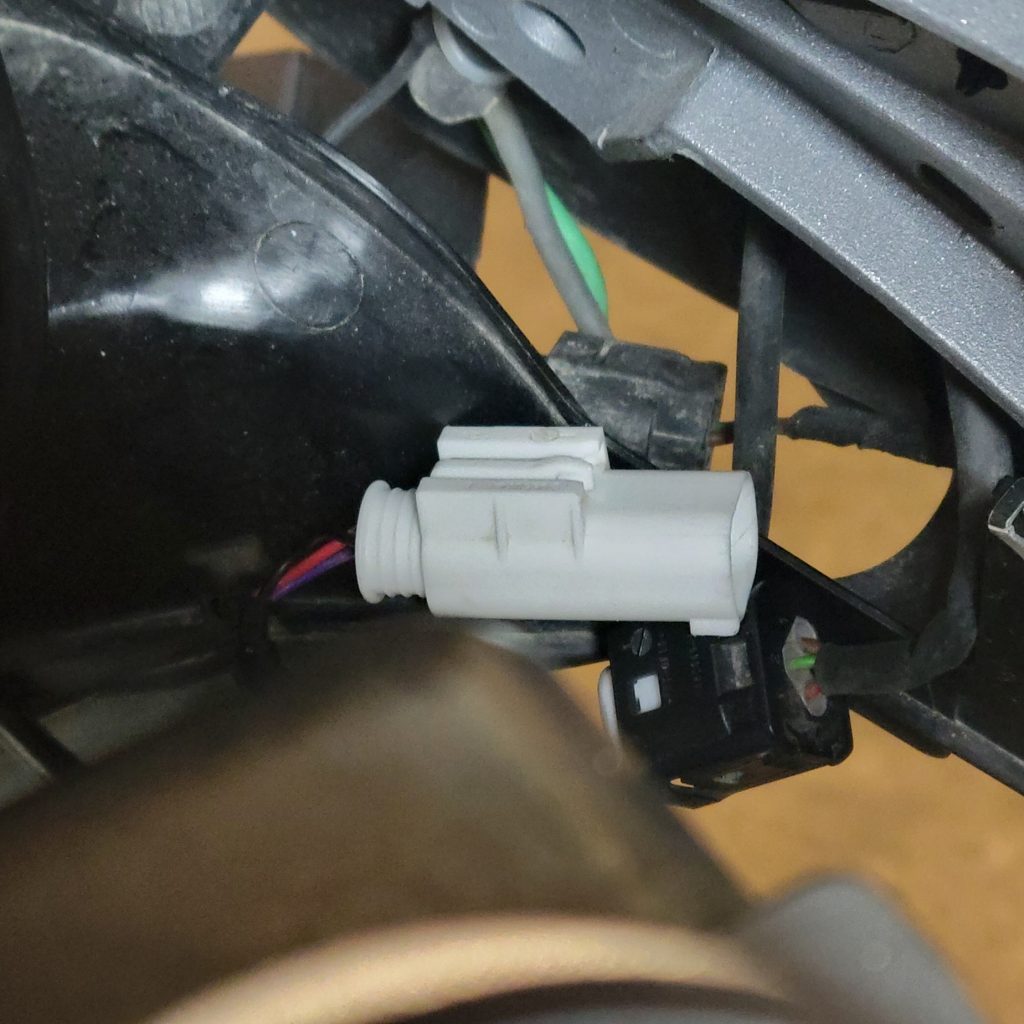
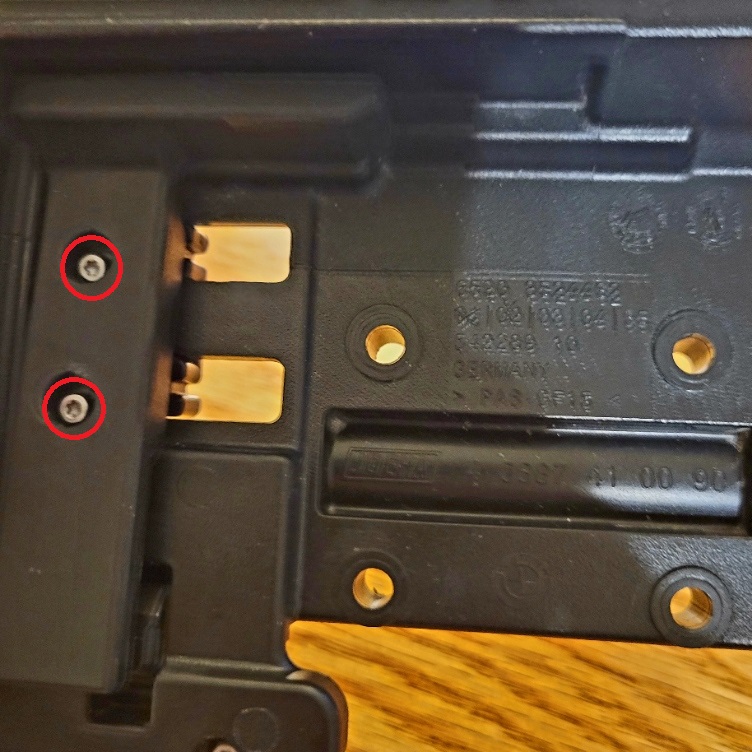
Cut the zip ties that are holding wiring for the BMW NAV. This wire is routed to the right and down into an area just to the right frame area. Follow the wiring and you will find a white BMW plug that is fastened to the frame with a zip tie. Cut the zip tie and pull the connector apart and pull the wiring up toward the front of the NAV base.
Step 4
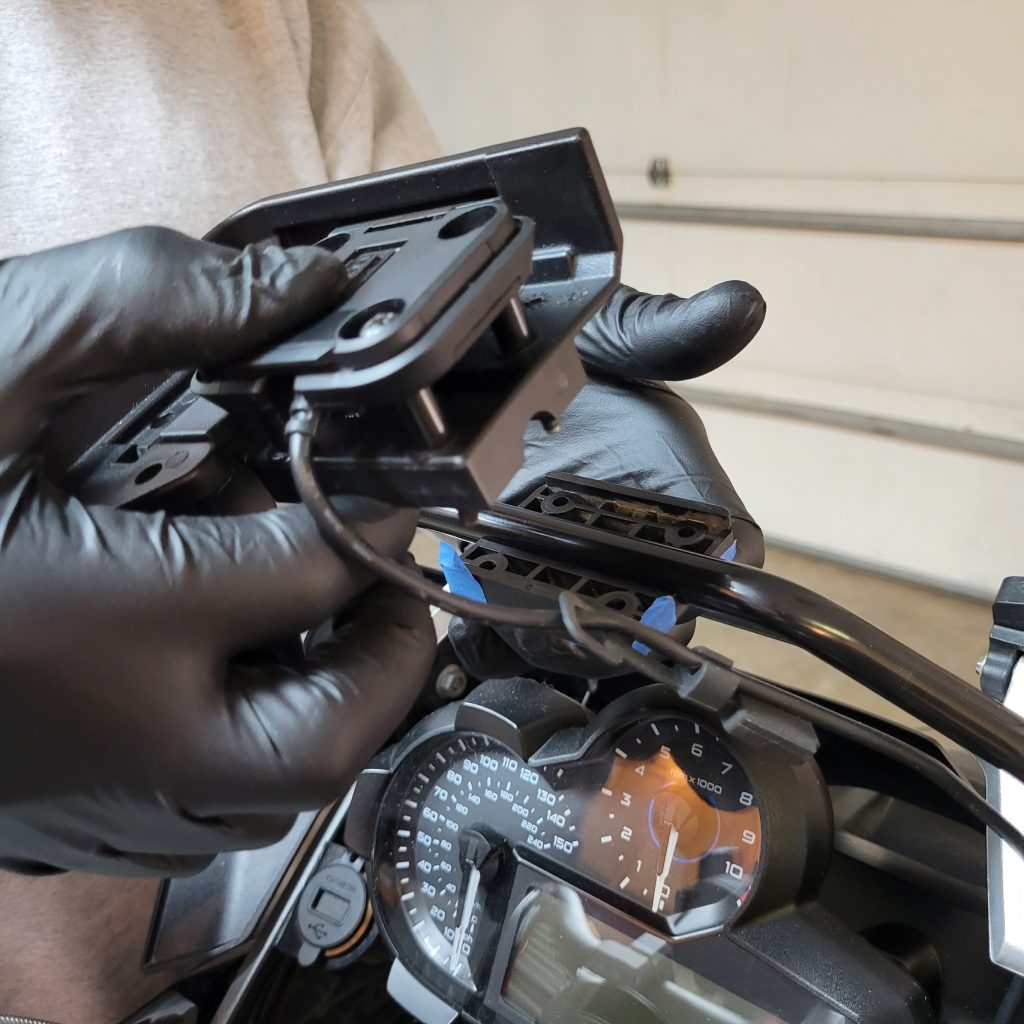
Use a T20 wrench to remove the 4 screws that hold the BMW NAV mount to the accessory bar. The mount will come apart into three pieces: The back plate, the locking mount, and the base plate that the NAV V/VI is attached to. You can set aside the old base for the NAV V/VI.
Step 5 ***IMPORTANT***
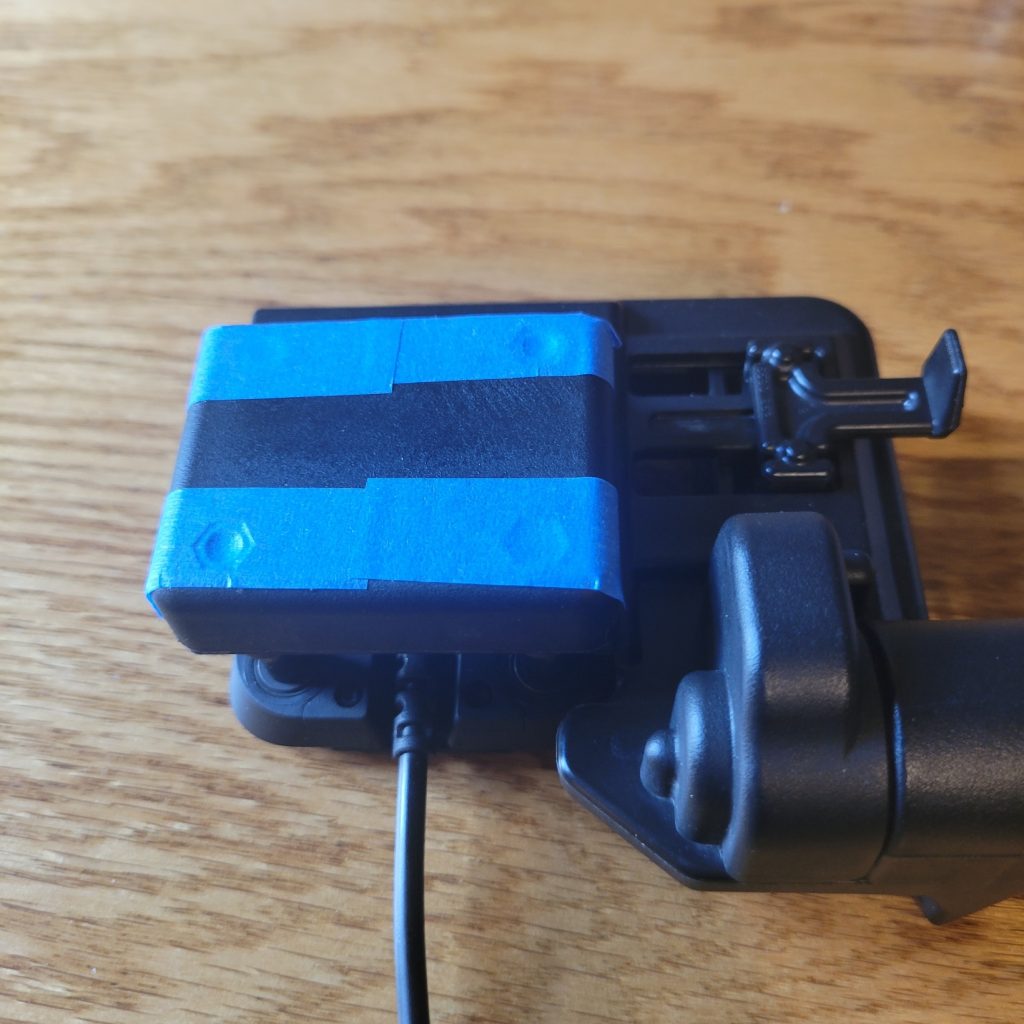
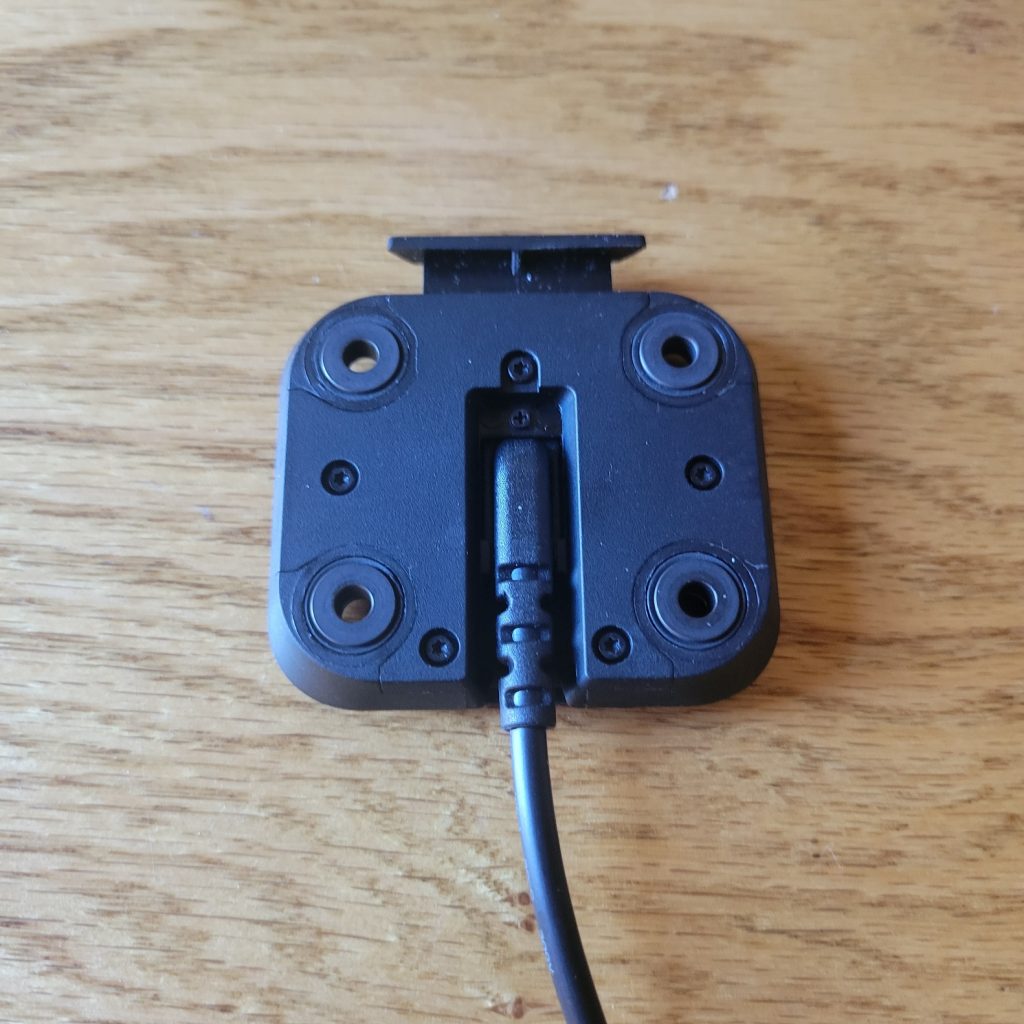
There is a package of screws and other parts that came with the Zumo XT. You will need to find the four grommet sleeves and install them in the back side of the Zumo XT mount. Mount the Zumo XT power cable to the mount according to the Zumo XT instructions. XT2 NOTE: The grommets and the power cable are already installed in the XT 2 mount.
Step 6
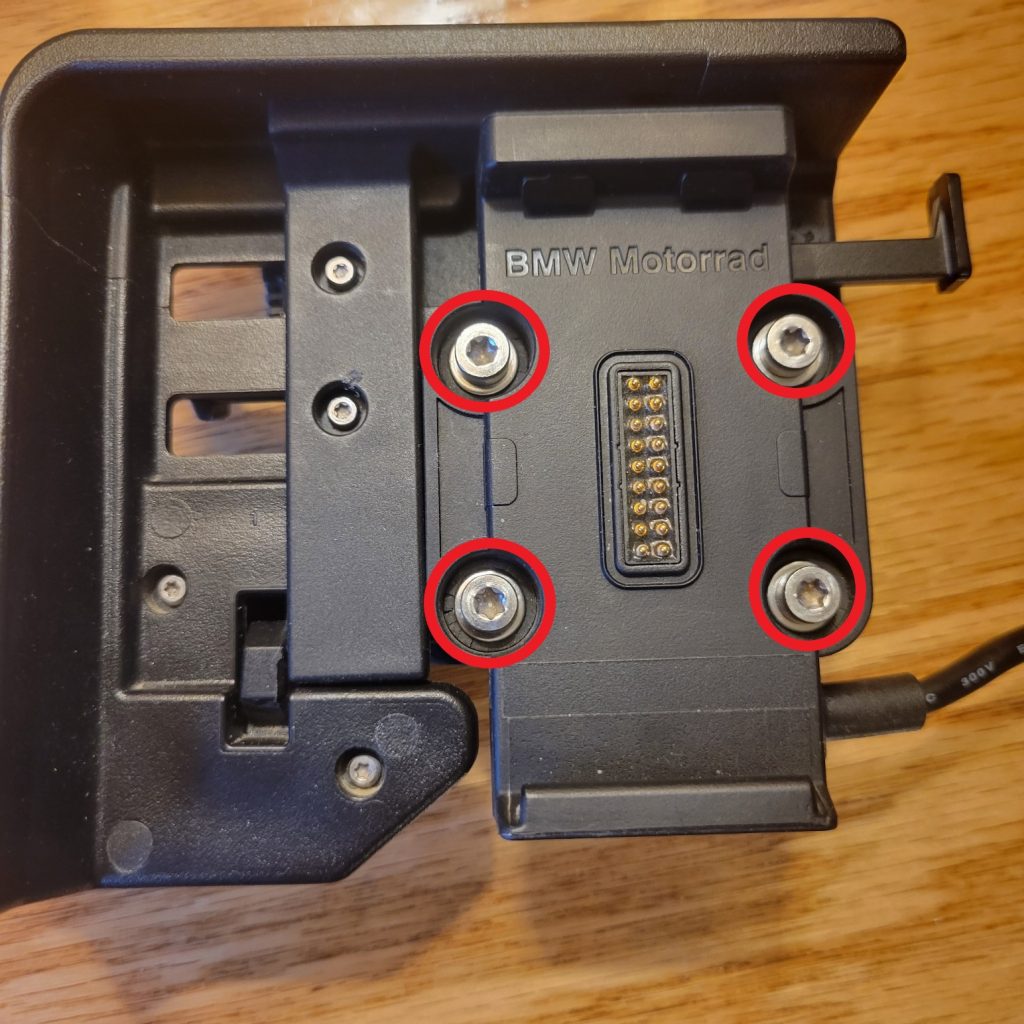
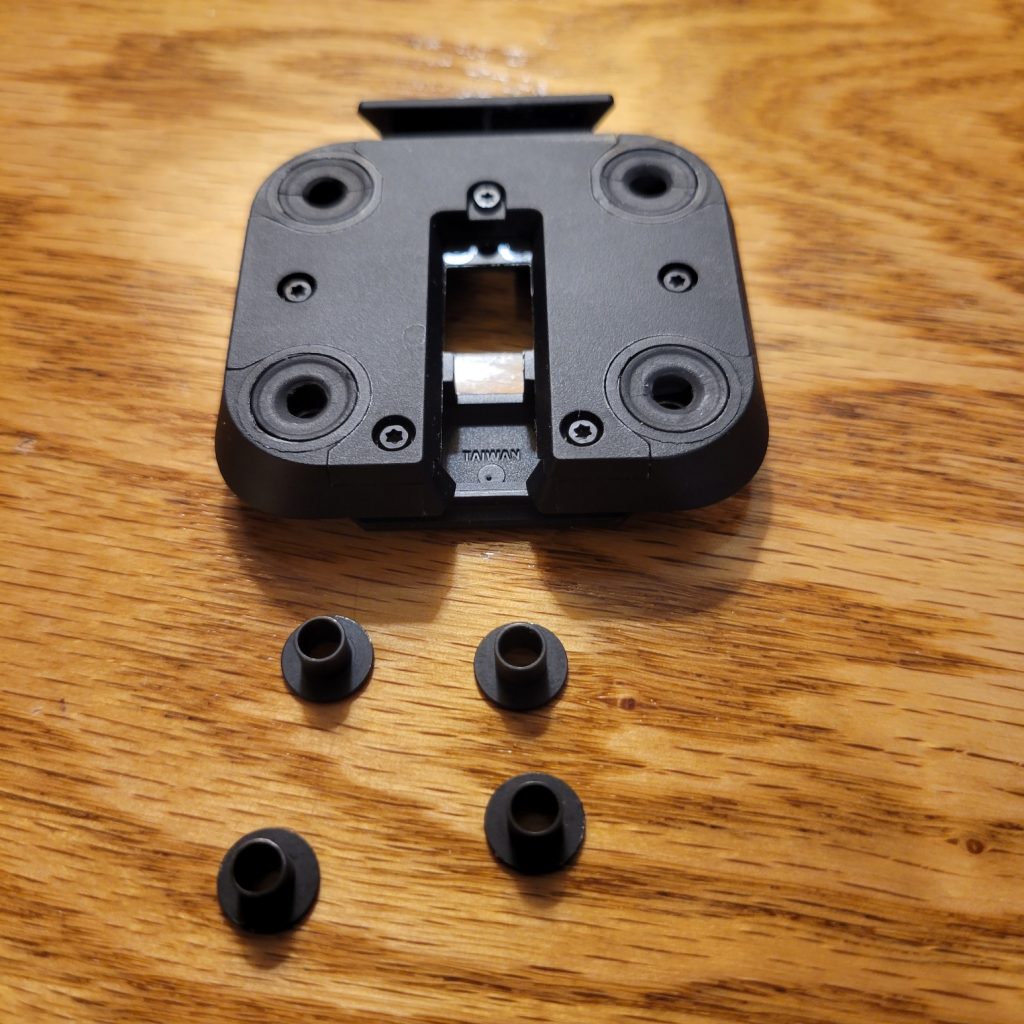
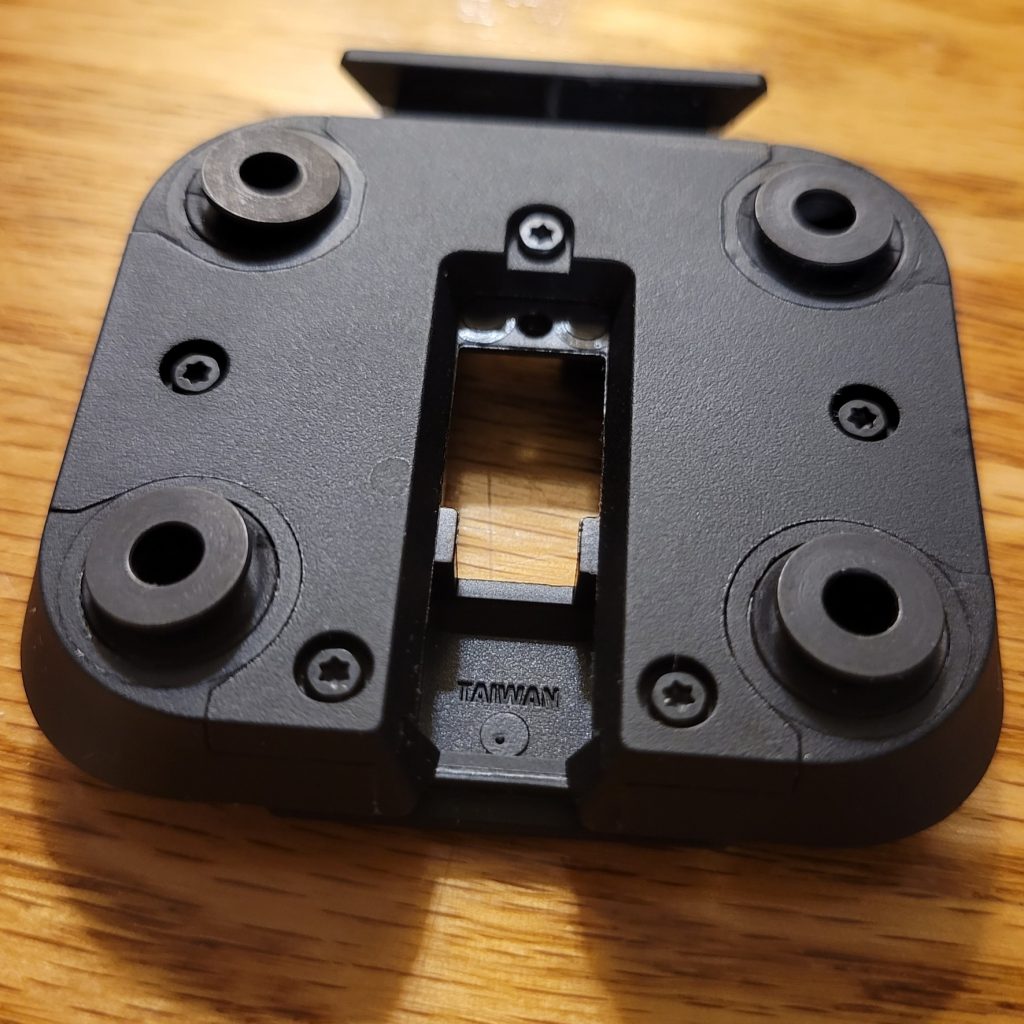
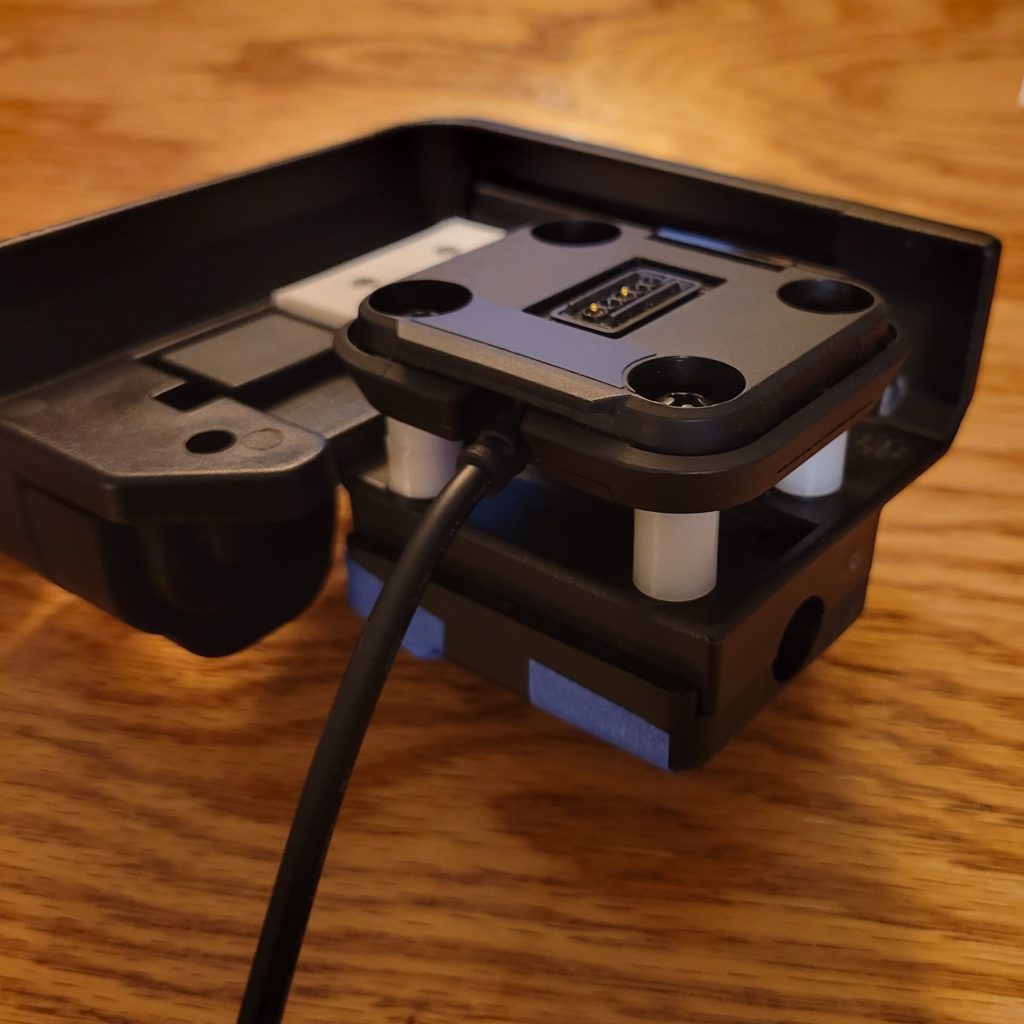
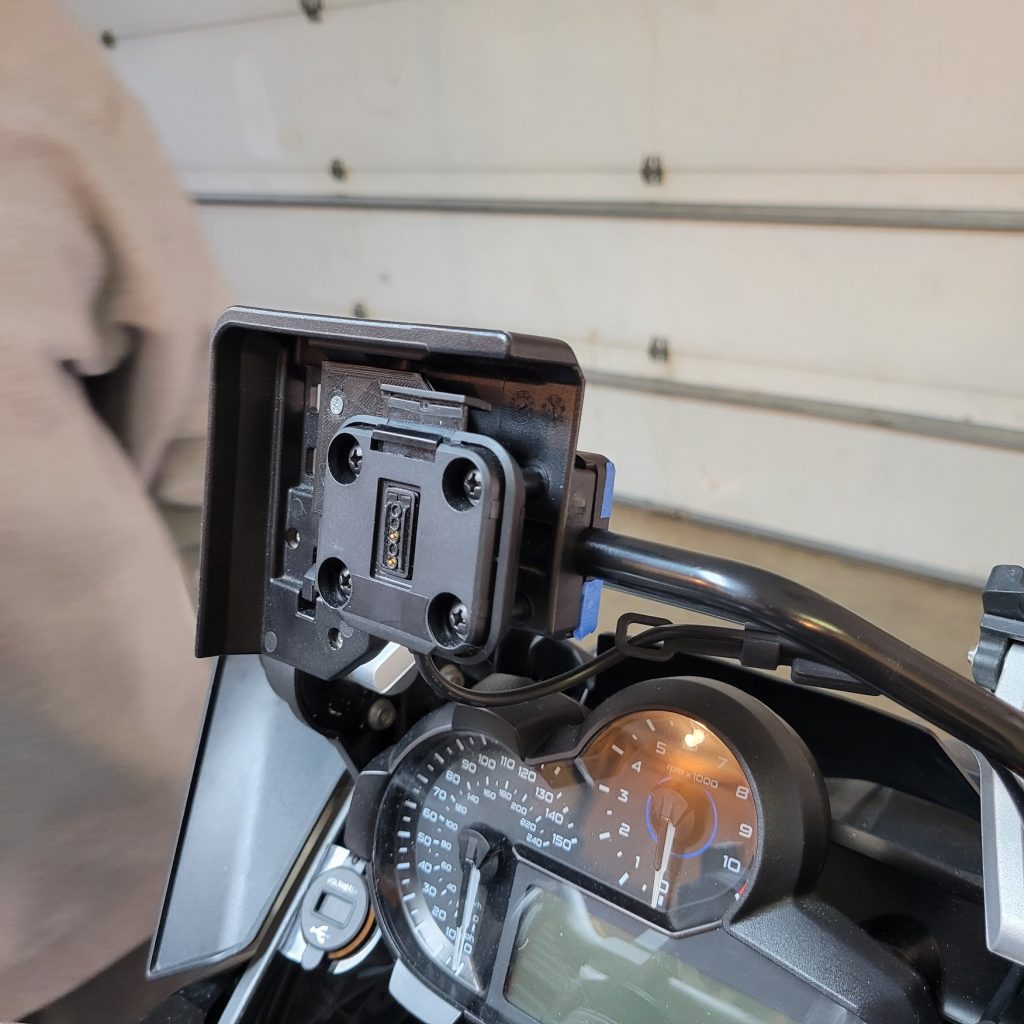
Install the supplied four 40 mm stainless steel screws, washers and spacers and install them in the ZUMO XT/XT2 base. Now take the NAV Base and put it in place over the screws and attach the back cover of the NAV.
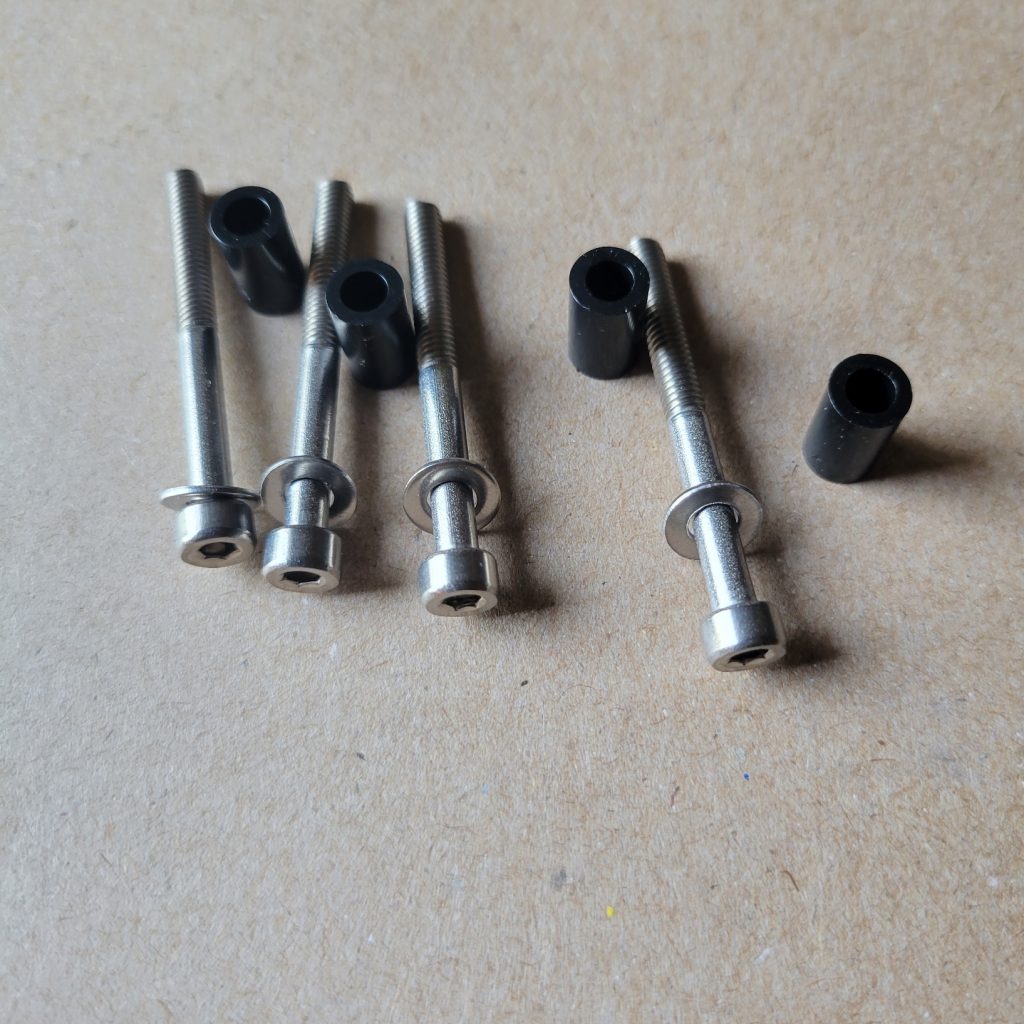
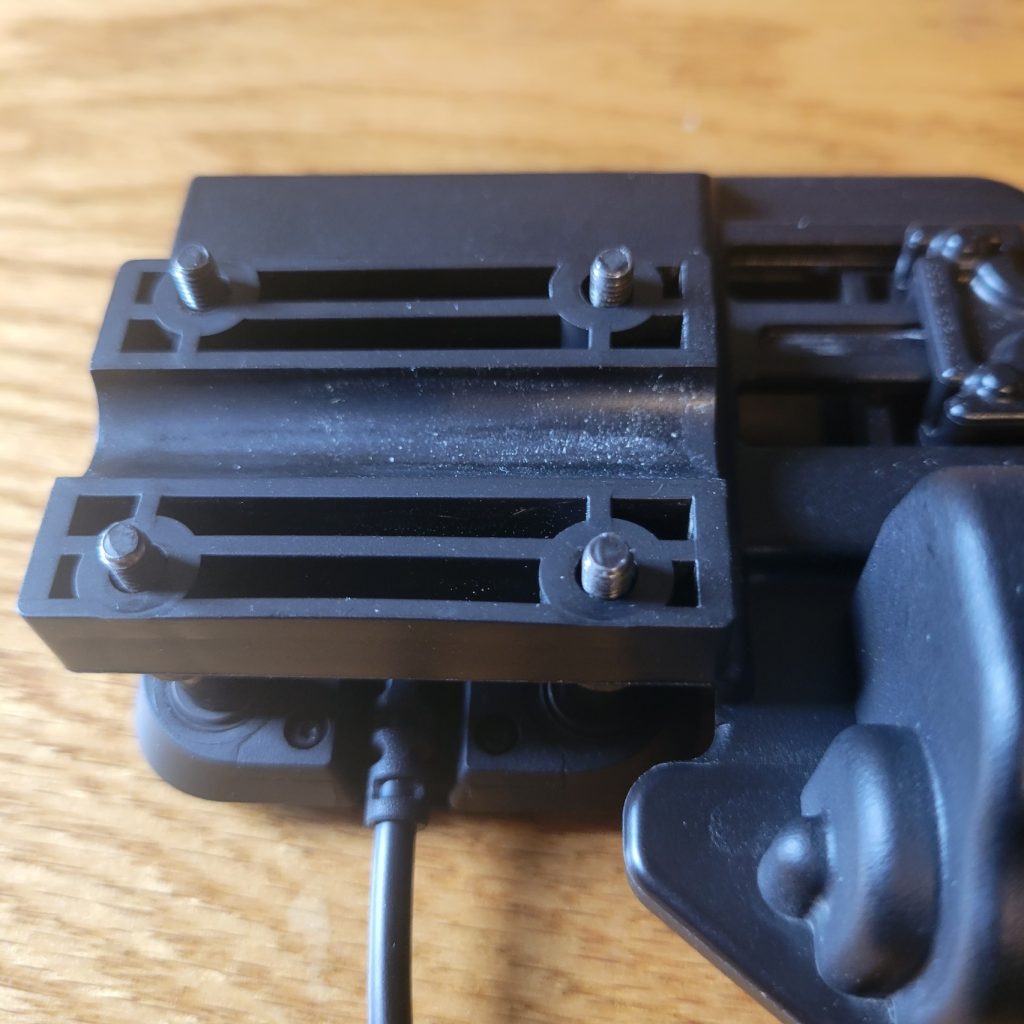
The screws may seem to be a little short, however once they are tightened down and the grommets compress around the mounting bar on the motorcycle you will find the screws are the correct length.
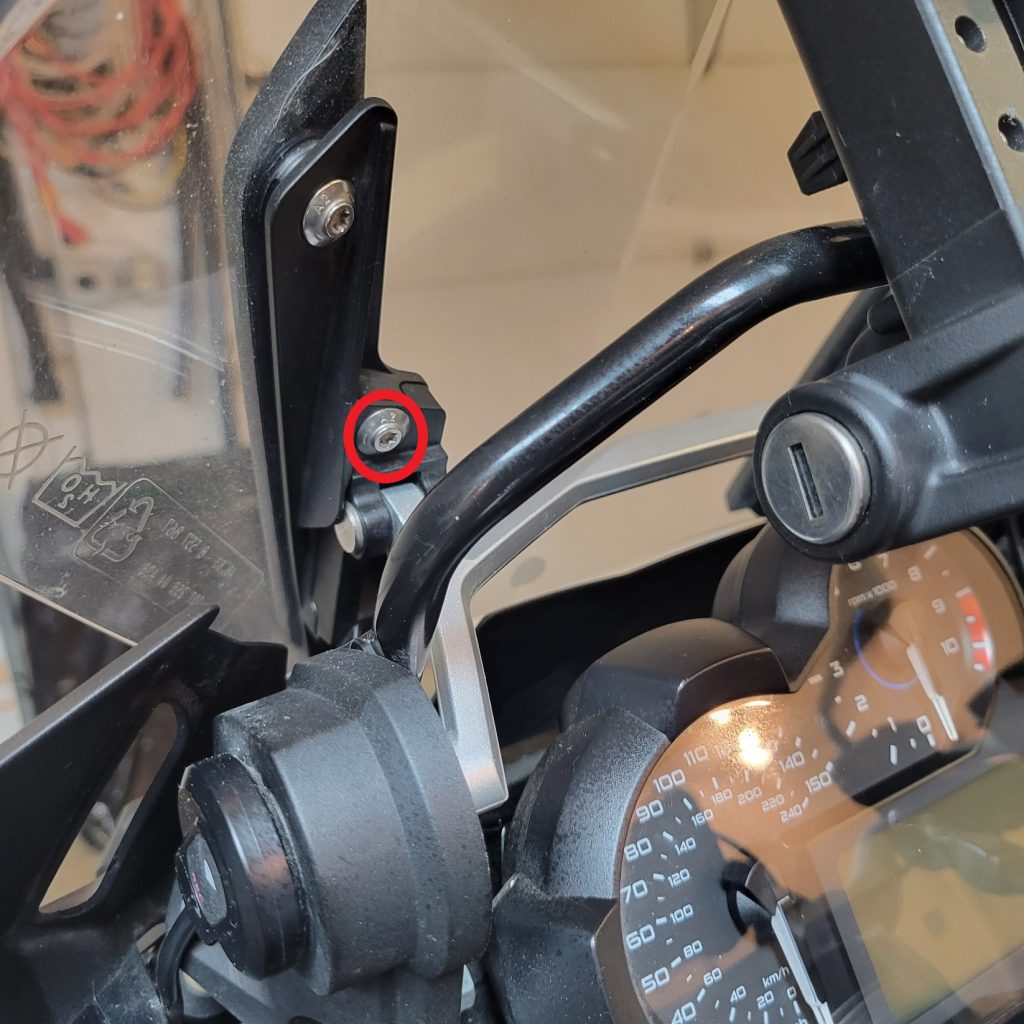
Step 7
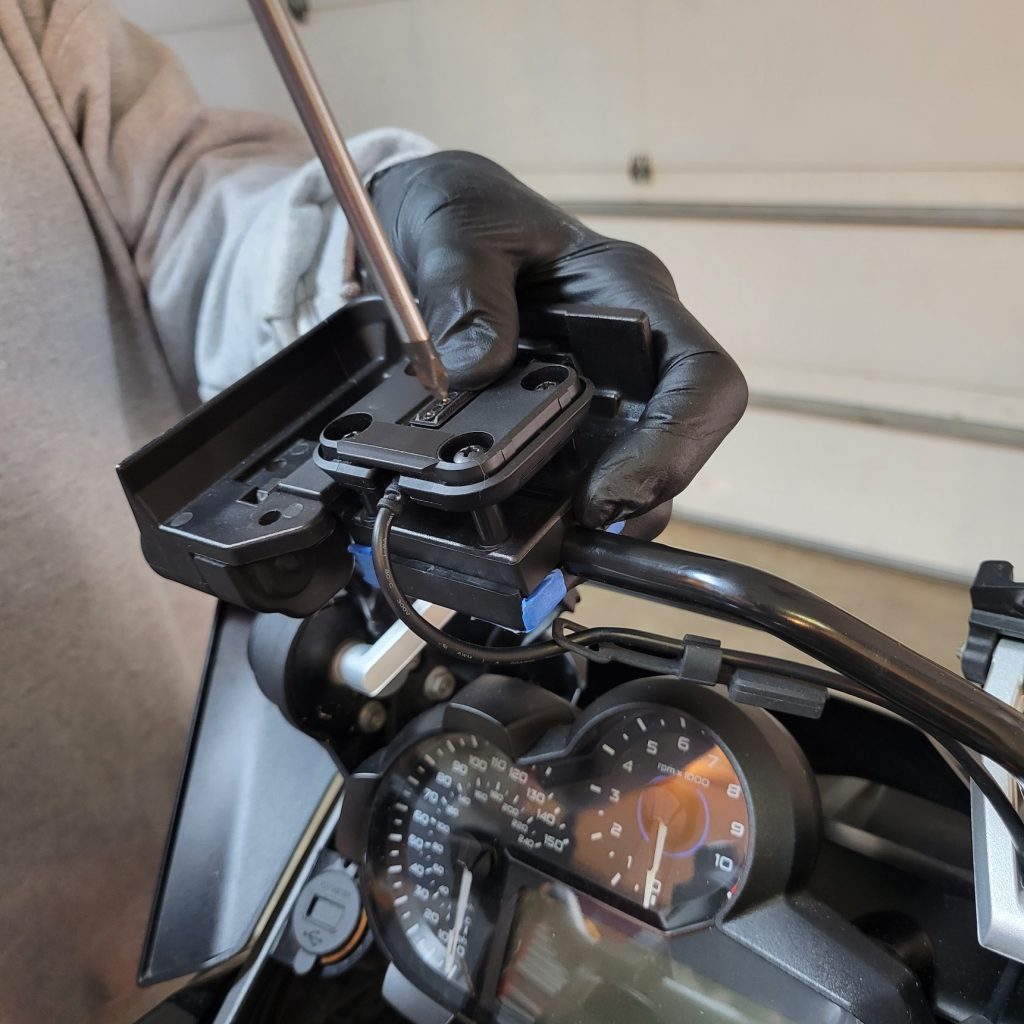
Use the T7 driver and remove the small screws holding the locking bar on the left side of the NAV base. Use the supplied screws (2) and washers and attach the “L” shaped Zumo XT locking adapter ON TOP of the slider bar and thread the screws into the tab on the back of the NAV holder.
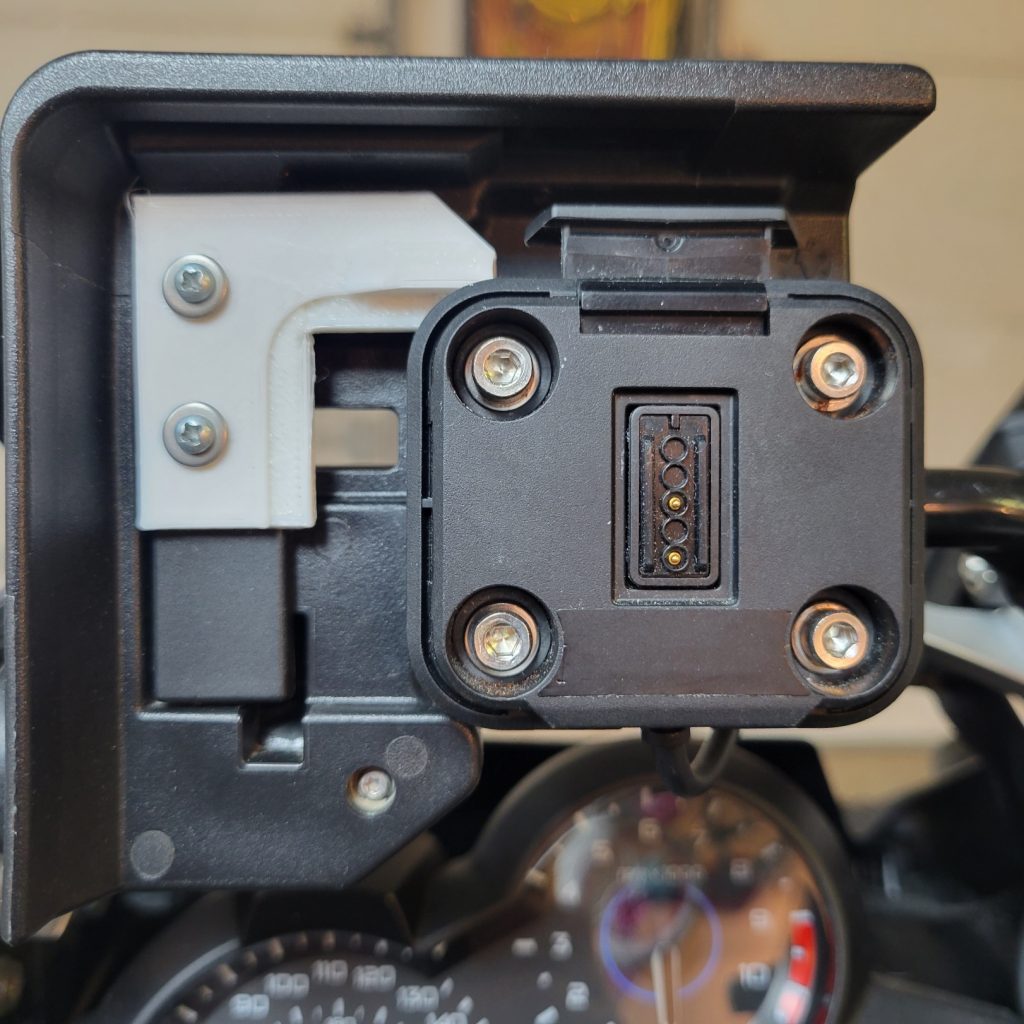
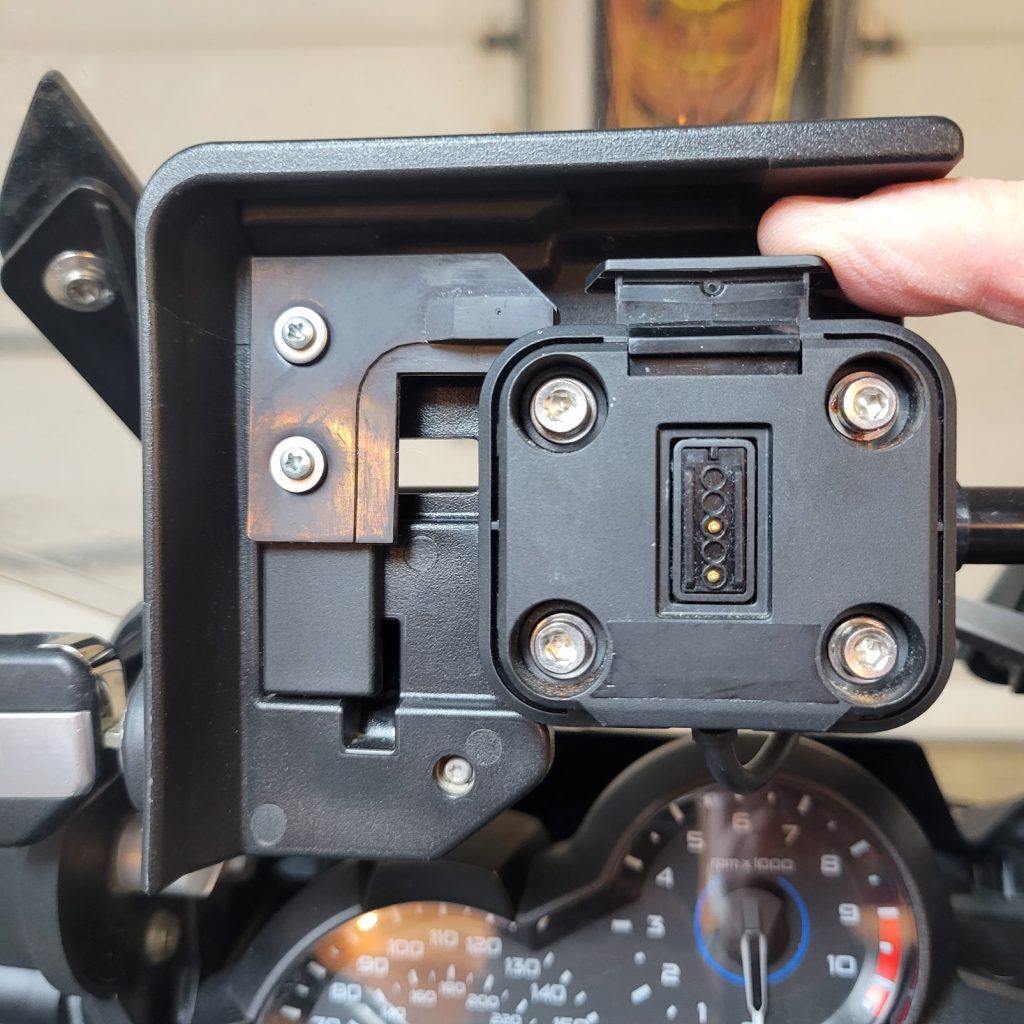
Once everything is assembled your Zumo XT/XT2 Nav base should look like this. The locking adapter and spacers are shown in white to make it easier to see. The parts that you receive are black.
Step 8
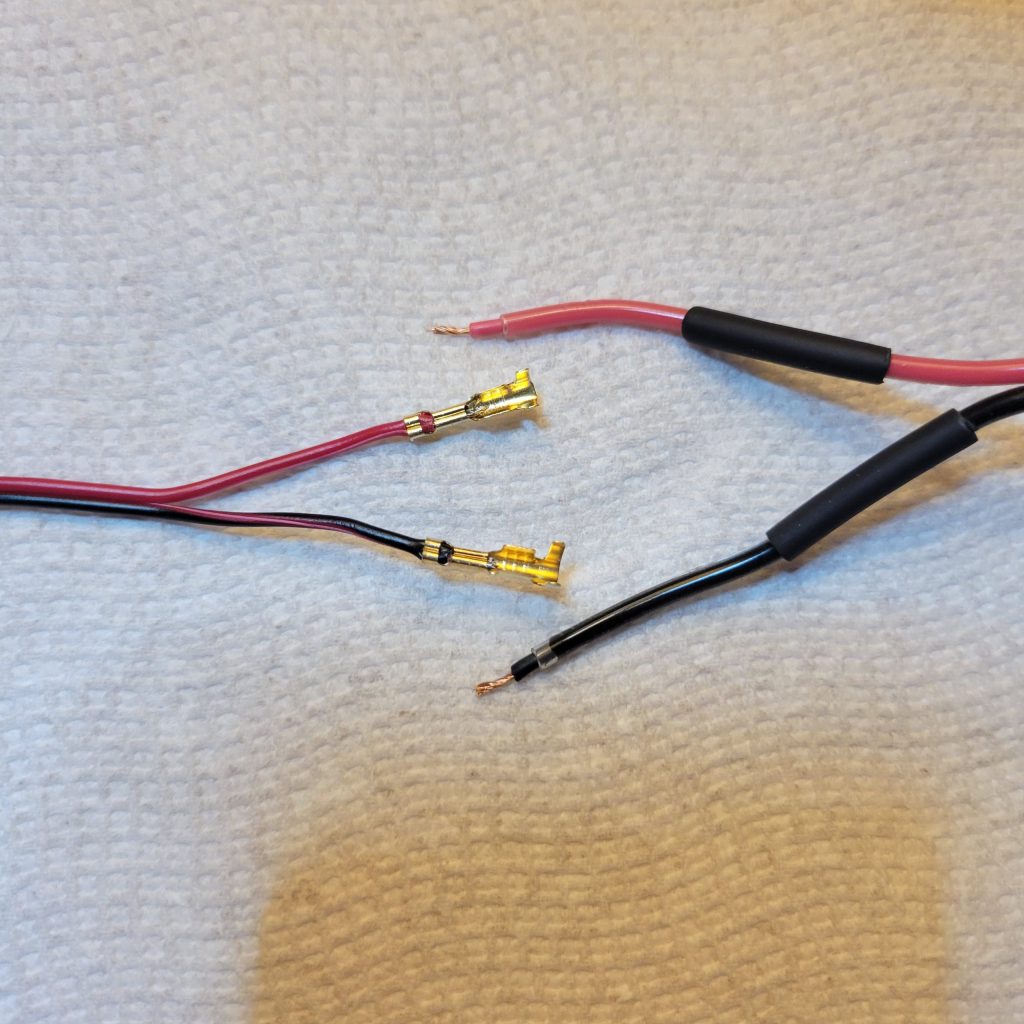
Using the supplied BMW male adapter crimp the wires together with the Zumo XT/XT2 wiring harness matching the red and black wires. Cover the connections with the supplied heat shrink tubing. OPTION: Cut the crimp connectors off and solder the wires together and cover with the supplied shrink tubing.
XT2 NOTE: the XT2 wiring can be cut to the required length before connecting the male adapter plug.
Step 9
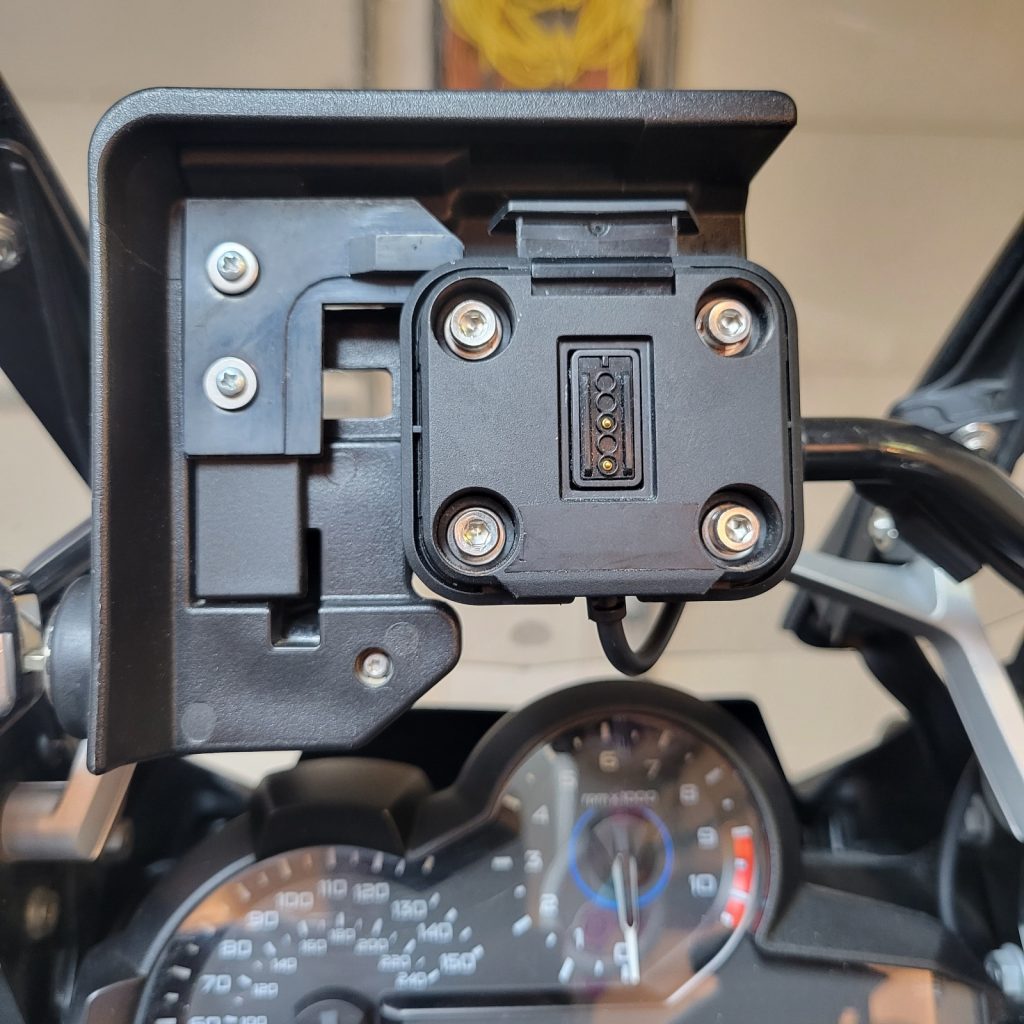
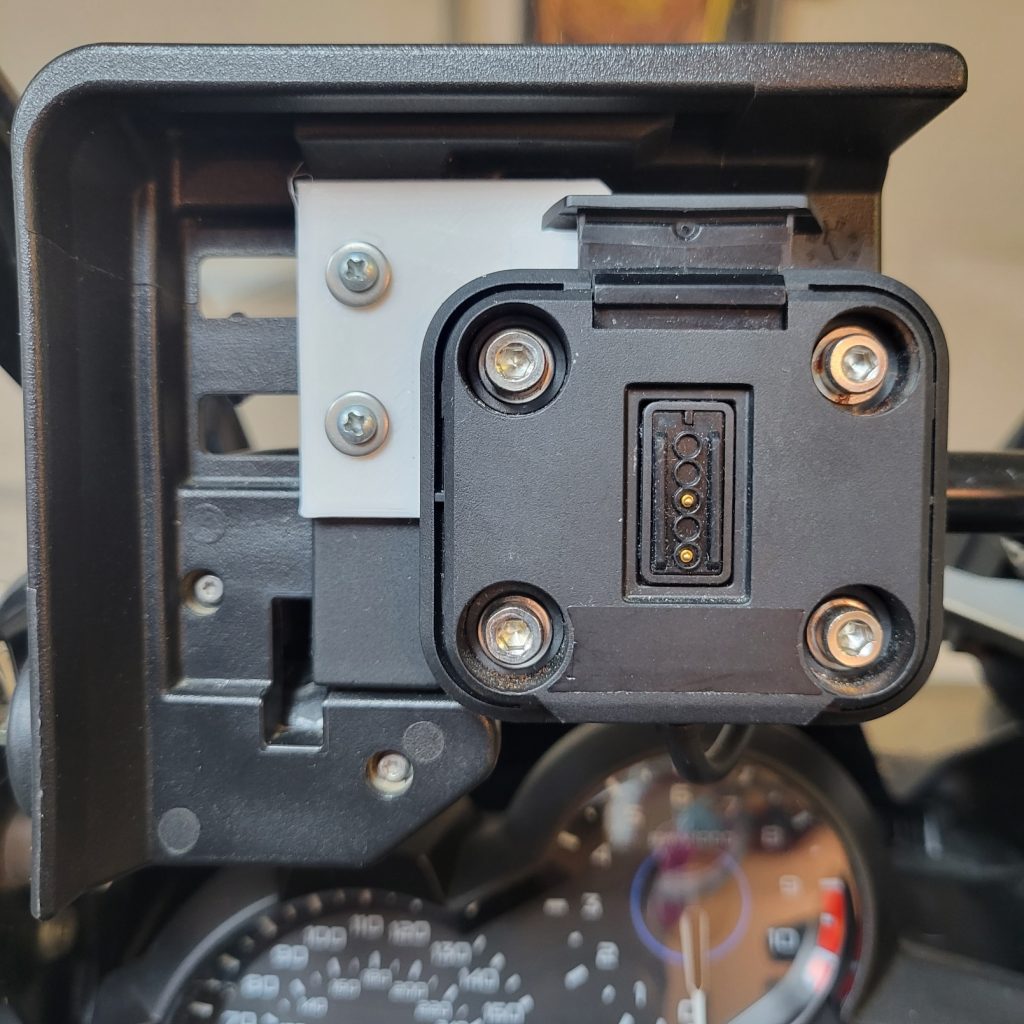
Mount the NAV base to the bow/mounting bar of your motorcycle. It is best to hold the back plate with one hand and hold the base plate and Zumo adapter with the other hand. Once in place you will be able to hold the entire base and back plate with one hand and tighten the screws. Tighten them snug but not tight until you determine the correct position of the NAV base. Once you have the NAV base in position you may need to loosen the two screws holding the locking adapter slightly and at the same time move the locking bar to the right to make sure the alignment is correct. It should only need very minor adjustments. It’s best to tighten all screws with the locking adapter all the way to the right. The correct angle of the Nav base is approximately 20 degrees.
Step 10
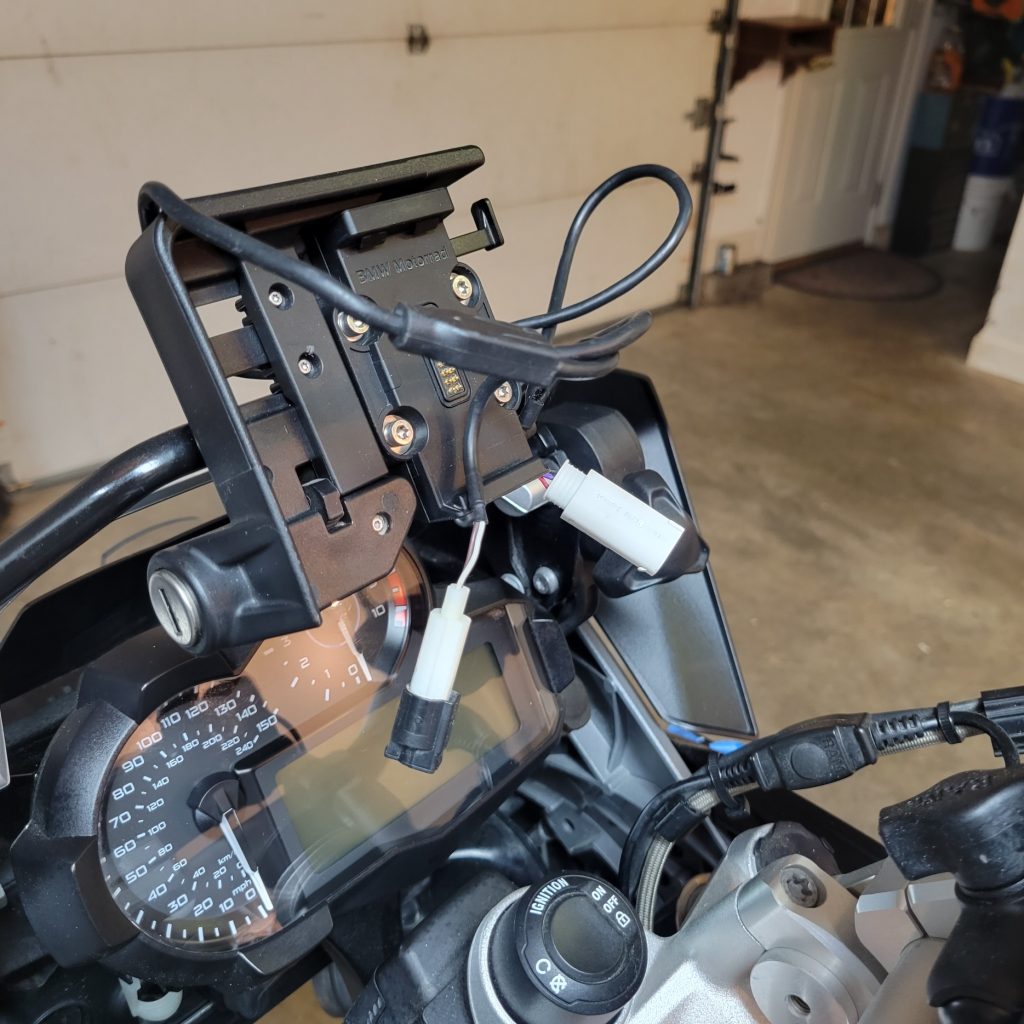
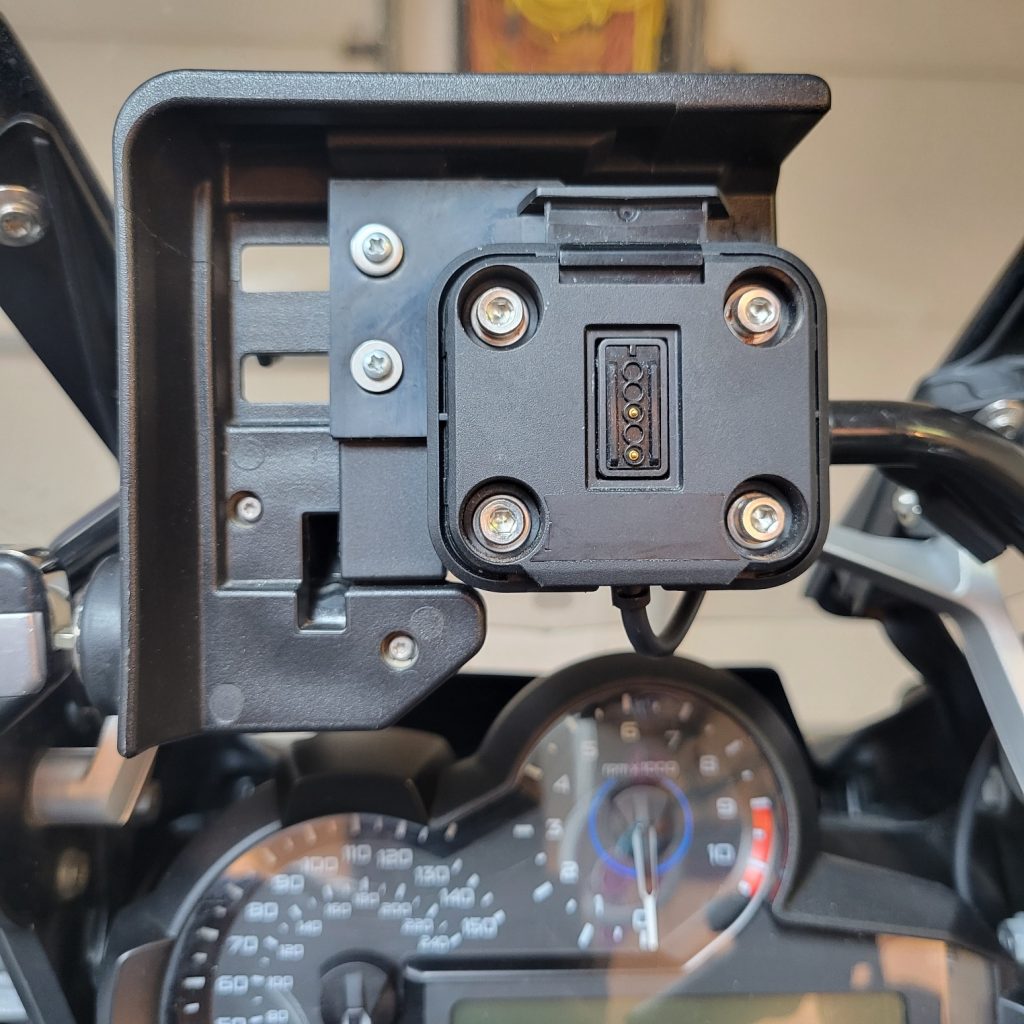
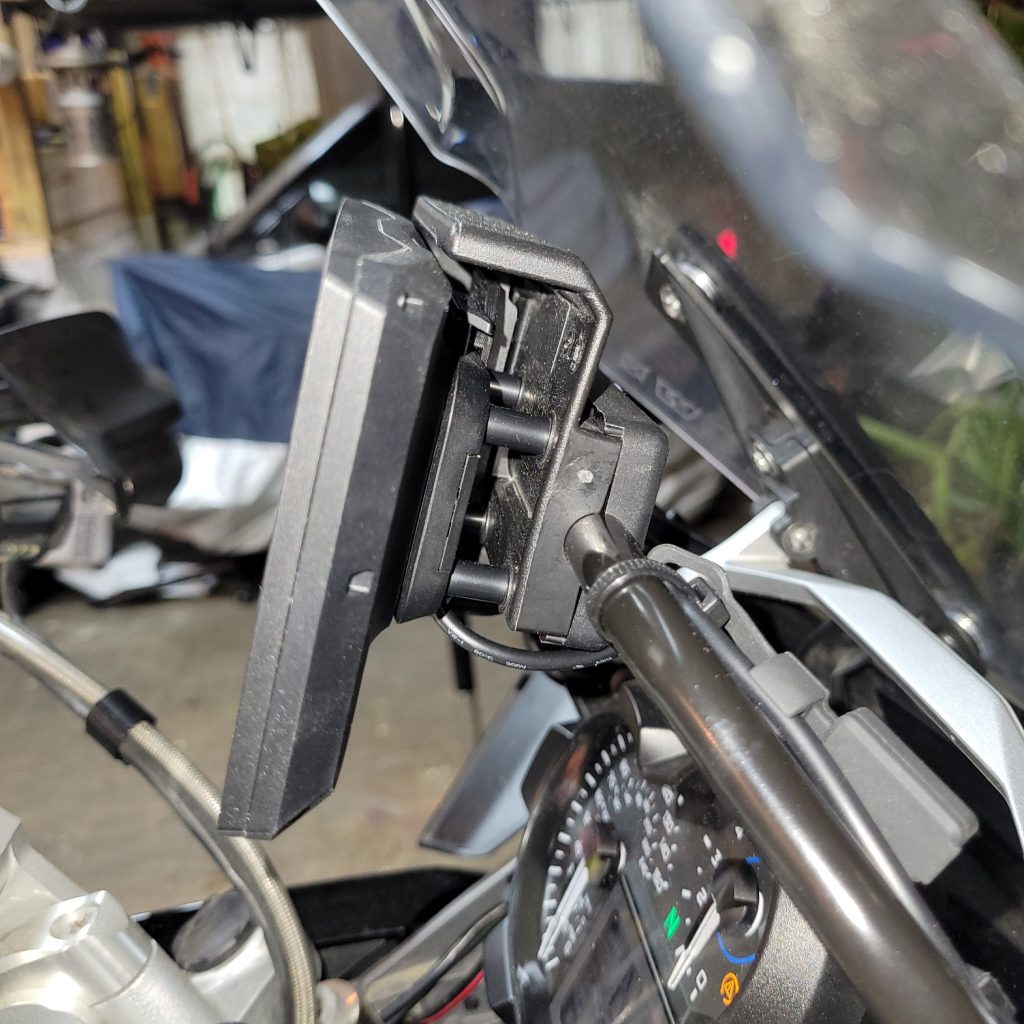
Route the wire across the bar and fasten it with the supplied zip ties. Plug the Zumo XT/XT2 wiring harness into the female plug that originally supplied power to the Garmin NAV base located in the rightside frame area. There is a lot of excess wire that comes with the Zumo XT/XT2. This can be wrapped up and hidden within the frame and fastened with the supplied zip ties.
Operation of the Zumo XT/XT2 locking device
Once the NAV base has been reinstalled on the motorcycle, operation of the NAV locking system is very similar to the old BMW NAV base.
To install the Zumo XT/XT2 to the base, make sure the key is installed in the lock and the lock/slider is all the way to the left. Place the Zumo XT/XT2 into the base according to the Zumo XT/XT2 instructions and make sure it securely snaps into place. Slide the tab on the back of the NAV base all the way to the right and remove the key. Your ZUMO XT/XT2 is now locked into the NAV base.
To remove the Zumo XT/XT2 from the NAV base, unlock the NAV base and slide the tab all the way to the left. Place your finger into the top right-hand side of the NAV base and push down on the release tab and the Zumo XT/XT2 will now be unlocked and easily removed.
Remove the tape holding the nuts on the back of the base plate and reinstall the windshield and you’re ready to navigate.
When you power on your motorcycle the Zumo XT/XT2 will power on like the BMW Garmin units. It will also power down after about 30-60 seconds after turning your motorcycle off.
Thank you for your purchase!
Please pass along the enclosed business cards to your friends or anyone who might be interested in purchasing The BMW Adapter.
If you have any questions, concerns or comments feel free to contact me at
contact@theadapter.net